Elements
SMART ELEMENTS Intelligent element (smart element) - used to automate the creation of content (filling) the page. The main functions of an intelligent element are the creation of lists of pages in the form of links with accompanying various information pages, which simplifies the structuring of complex elements. The following smart elements are presented in our CMS: - Normal link - allows you to display a list of links to pages with a simplified visual design. For standard templates, this element displays the page names.
The following settings are available for this item: "Publication date" - if you check this box, the hyperlink will be displayed with the publication date if the page has a time of appearance. "Add content to the newsletter" - if you enable this setting, then this link will be a link only on the site, and when generating a newsletter for this page - the link will go not to the link, but to the full content of the page on which it is installed; "Only the first part of the header" - specifies the inclusion of only the main page header in the link. - Major link - displays a list of links to pages, usually with rich visual design. By default, for all templates, this element displays a page icon, its name and a short description.
The following settings are available for this item: "Publication date", "Add content to the newsletter", see "Normal link" settings. Page text - allows you to add not a link, but a whole page, with all the content on it. The following settings are available for this item: "Date of publication" is similar to the option in the "Normal link"; "Lower header level" - lowers the level of the headers of the imported page by one level; "Add page title (in italics)" - this option allows you to enable or disable displaying the title of the page - the content source; "Only the first part of the header" is the same as the option in the "Normal link". - Site map - the element is designed to create a list consisting of links to pages. The map in this case includes the selected page and the pages embedded in it.
The following settings are available here: "With descriptions" - adding descriptions to the sections of the site map; "List" - display the site map in the form of a bulleted list. If you turn off this setting, the map sections are displayed in a column, but without naming the pages; "Number" - the numbering of sections of the card; "Date of publication" - adding to the page names the date of publication; "Description on a new line" - serves to display a description of the pages under their name; "Do not show the root page" - hides that page from the list that was selected as the source; "Only the first part of the header" is the same as the option in the "Normal link"; "Include pages that are not in the local list" - allows you to include in the list of pages for which the "Do not show in sequence" check box is selected. "Do not include the last level" - to limit the nesting of the site map; "Abbreviated name only" - the abbreviated name will be used. - Active logic - an element allows you to connect an executable script to the page, i.e. is intended for selection and insertion of the required php-file.
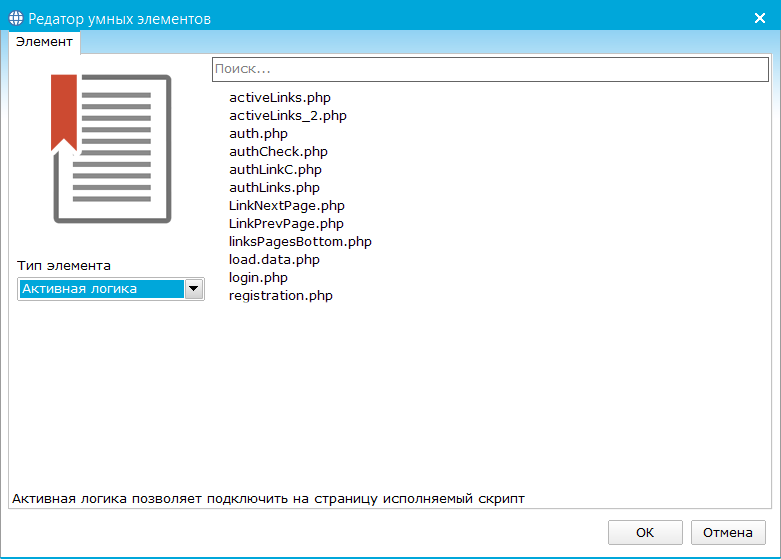
To add php-files to the pages of the site, it is enough to upload them to the local folder of the site "active". 
- Catalog of goods, Order panel, Basket.
- Form Catalog - allows you to create a search and display a table that is associated with a generic form.
- Form output - displays the previously configured form display.
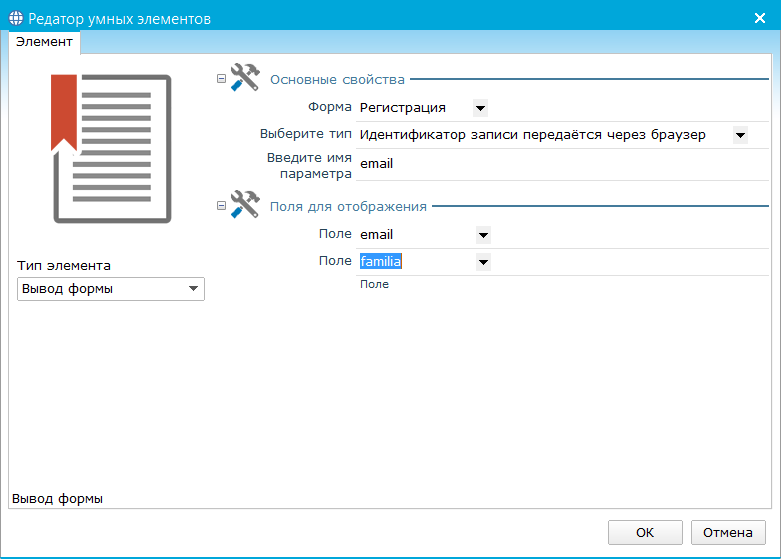
To insert an intelligent item on a site page, follow these steps: Select the "Element" function in the text editing panel:  In the "Smart Elements Editor" window that appears, you can select an item and on the "Page" tab specify a page on which the smart element will be placed. On the Element tab, a list of smart elements is available. After selecting one of the elements, a list of its properties appears. Here you can select the properties of the element that apply to the page (setting the display of information). 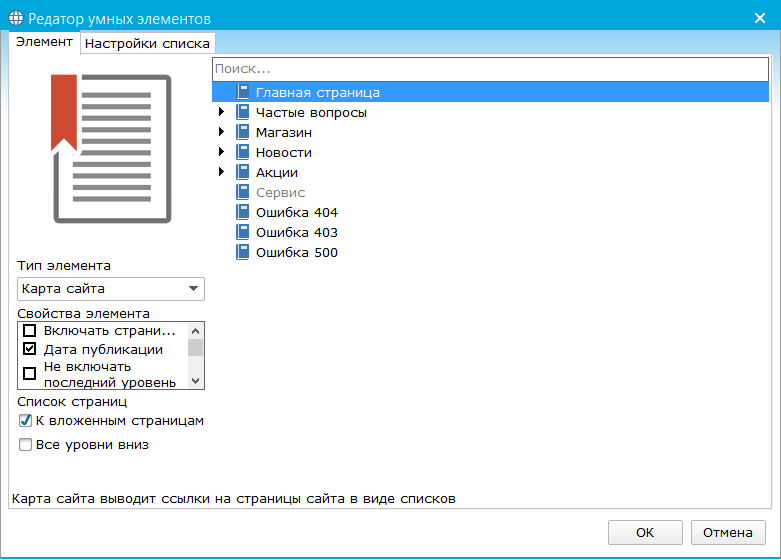
CATEGORIES The "Categories" item is designed to distribute the content of the site by category, one or more categories may be selected for each page. Here you can add or remove categories required for page allocation when generating intelligent items. This will allow the user to more quickly find the necessary information on the site, viewing the entire category will help to read not only one page, but also all thematically related pages. You can apply to the category page by selecting the "Categories" item in the properties panel. In this window, you can also create a category or delete it by selecting the appropriate items in the right pane of the Categories window. 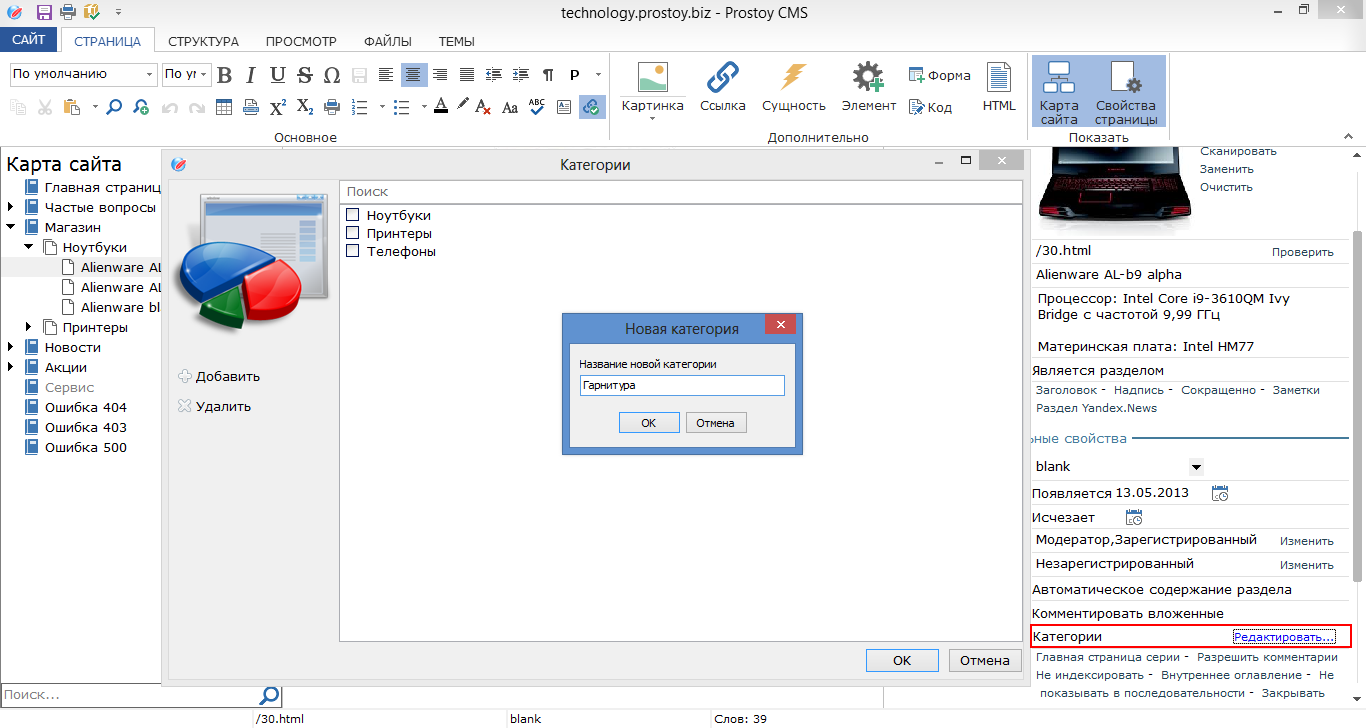 In the Insert Smart Element window on the "List Settings" tab, you can choose which pages the list will belong to. 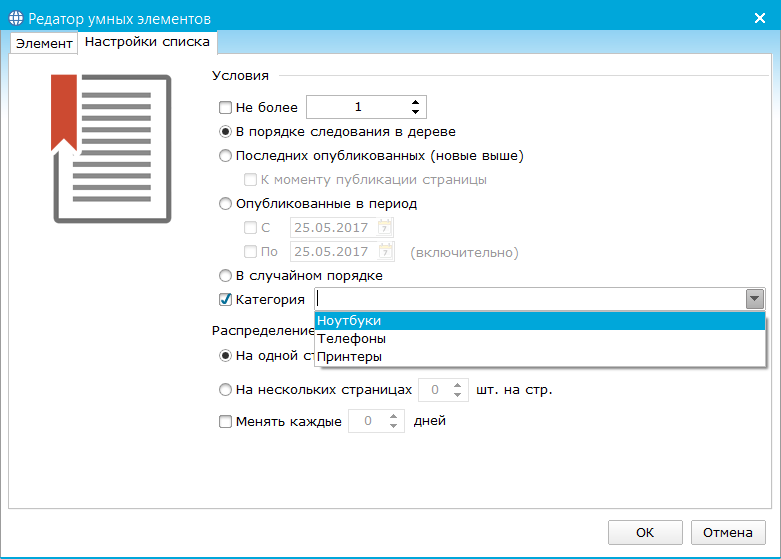
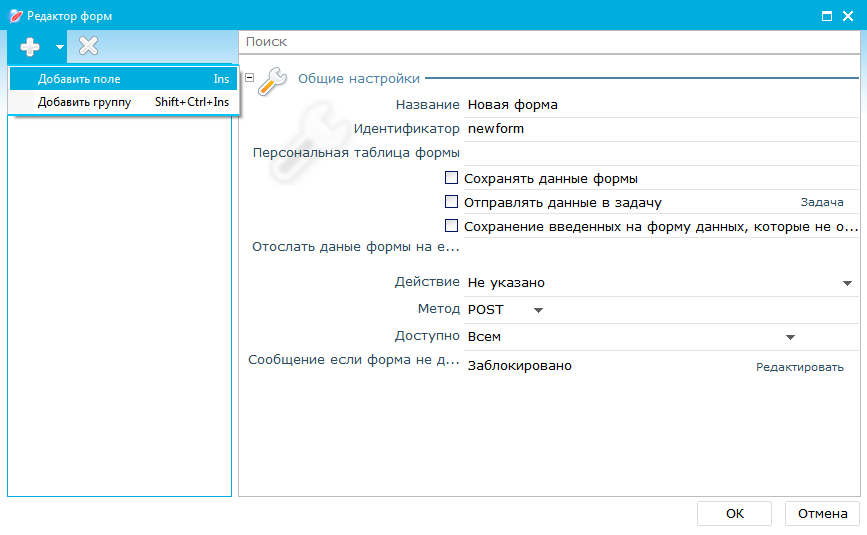
ADVANCED PROPERTIES OF THE PAGE Using advanced site properties, the user has the opportunity to add additional properties to the page. The extended properties editor window can be opened by selecting the appropriate item in the "Site" menu. In the "Advanced Properties" window, you can configure what page properties will be available for the current site. In the editor, you can add an extended property, delete, move it in the structure up / down, and also edit the existing properties by clicking on the corresponding row with a double click. For properties, you can set the following parameters: The position of the property is whether the field is expanded or minimized in the tree form by default. Check if the field is full - if the user has not filled in the field, it will be highlighted in red. Editable field - the user will be able to enter a value in the field. Name - enter the name of the extended property. Type - indicates the type of the value: string (default), date, date and time, integer, real number, check-box, drop-down list, image or file. Value is specified for properties such as string, date, date and time, integer, real number and check-box the default value in editors corresponding to the type of the property, and for properties of the type drop-down list - specifies the values of this list via a semicolon (value by default, then the first element of the list will be). Visibility conditions - specifies a condition that determines whether to display this particular field in the editor on a particular page. The conditions are selected in the drop-down list by ticking - the user himself marks the templates for which you want to display the property. In addition to the templates, the drop-down list also contains items "Is a product" and "Not a commodity", if the jack is for this item, then the field is displayed only for the page that is a commodity or not. Similarly, there are items "Home Page" and "Not the Home Page". If the jackdaw is not worth for any item, the visibility condition "Always" and the field is visible for all pages. Galok in the list can be several, in the presence of several daws the condition works on the principle of "or". 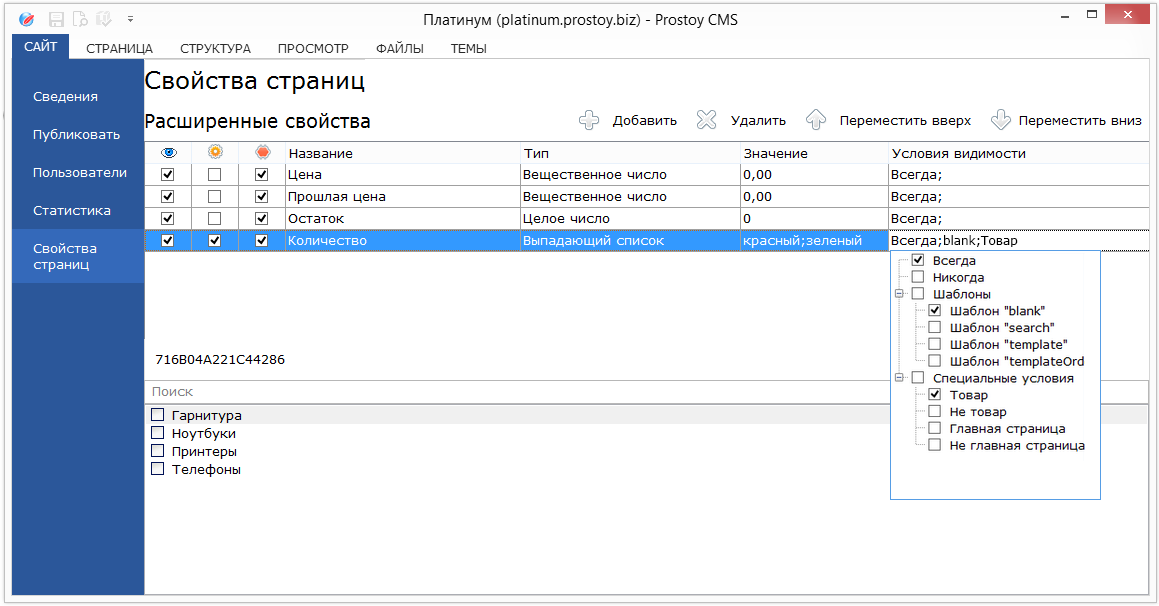 These properties are displayed when editing the CMS pages in the properties panel under the "Advanced Properties" group. For more information: "Price", "Past Price", "Balance". For normal pages, these properties are not available. GENERAL PROPERTIES OF THE FORM Editing of already existing forms is done by calling corresponding items in the site properties window. You can create a new form by choosing "Insert form" from the drop-down menu in the edit panel. 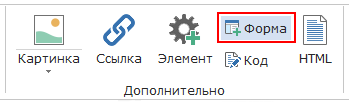 The left part of the form editor window shows the list of elements on the developed form, in the upper left corner of the window there are buttons:  - button for creating an element (field or group of fields); - button for creating an element (field or group of fields);
 - button for deleting items. - button for deleting items.
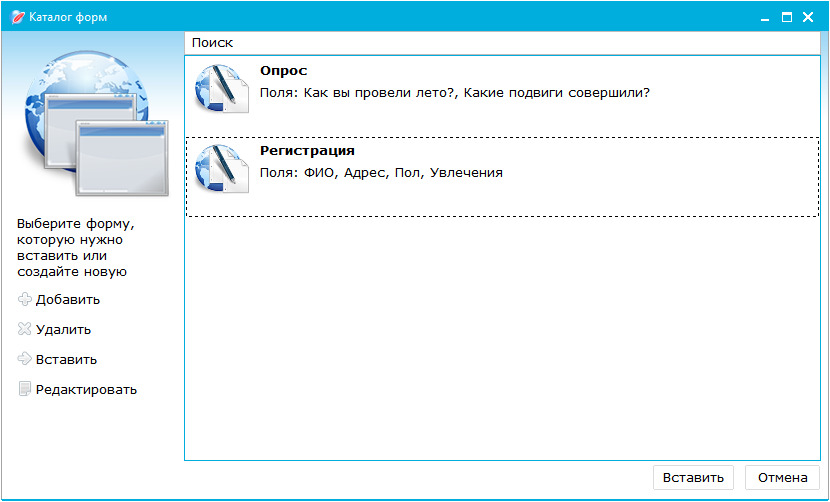
Adding forms to pages After selecting the item "Insert form", the "Forms catalog" window opens, in which previously created forms are displayed. The left panel displays a list of actions that can be taken with the forms: - "Add" - opens a window for creating a new form;
- "Delete" - if you select one of the existing forms, you can delete it;
- "Paste" - the form is inserted on the current page;
- "Edit" - the selected form is opened for editing.
|