Creating document templates
On the "Documents" tab in the organization window you can import the existing set of templates, edit the imported templates, and create your own document templates. On the "Documents" tab you can use the following functions:  - opens a drop-down menu with the ability to add a document type, a template; - opens a drop-down menu with the ability to add a document type, a template; - removes the template or document type selected in the tree; - removes the template or document type selected in the tree;- "Edit" - opens the selected template for editing;
 - updates for imported templates, fields, and resources. The drop-down menu allows you to select which updates to download; - updates for imported templates, fields, and resources. The drop-down menu allows you to select which updates to download;- "Import" - calls the document import wizard. You can import templates and fields from the standard set, as well as from a third-party organization within the Simple Business system, which exported its templates.
ADDING THE DOCUMENT TEMPLATE Add a new document template You can by selecting the function of the context menu "Add template" (the Ins hot key) or by pressing the button . Templates can be grouped by document type. By default, new templates are added to the "General Type" group. You can add the document type in the same way as adding a template. 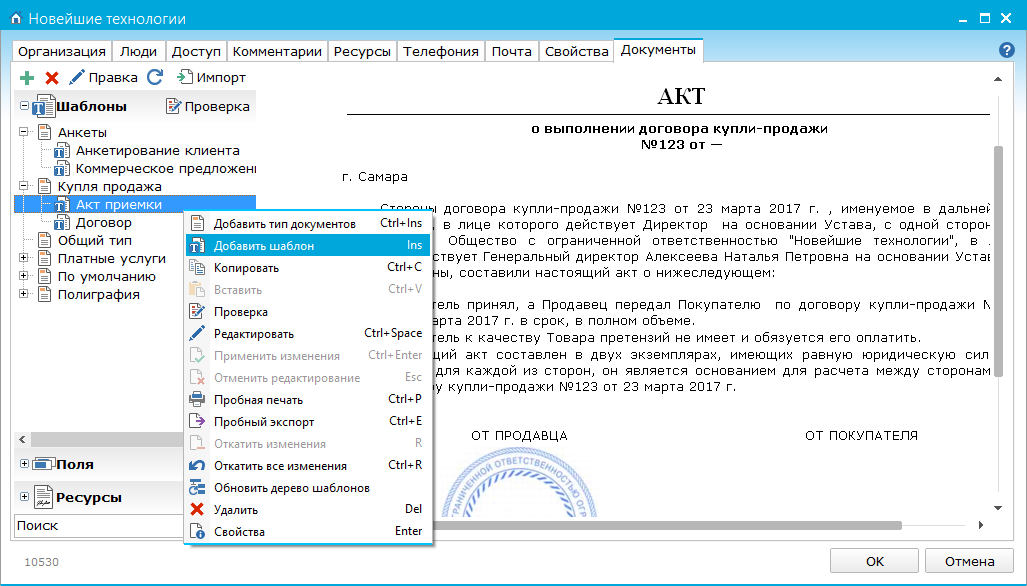 Context menu options: - "Add document type" (Ctrl + Ins) - adds a new type of documents in the document tree;
- "Add template" (Ins) - adds a new template in the document tree;
- "Copy" (Ctrl + C) - copies the template;
- "Paste" (Ctrl + V) - inserts the template;
- "Check" - performs a check on the template;
- "Edit" (Ctrl + Space) - the selected template goes into edit mode. You can make changes to the template;
- "Apply Changes" (Ctrl + Enter) - saves changes to the template that was in edit mode;
- "Cancel editing" (Esc) - the template returns to the state before editing;
- "Test Print" (Ctrl + P) - You can print the template and see how it will look in paper form;
- "Trial export" (Ctrl + E) - You can save the template on your hard disk in doc, pdf or zip-archive format or publish a template on the network and give a link to download the template to any user;
- "Rollback changes" (R) - restores the template to the original version of the template (the current version is deleted);
- "Roll back all changes" (Ctrl + R) - cancels all actions performed on the template;
- "Update template tree" - updating / downloading of existing templates from the server;
- "Delete" - Deletes the selected template or type of documents;
- "Properties" (Enter) - opens the properties window of the selected template or document type.
WINDOW OF TEMPLATE PROPERTIES In the document type properties window, you can change the name of the type, view the list of documents belonging to this type, and enable the "Allow export" option. The exported group of documents will be available for import to other organizations within the framework of the Simple Business system. To access the template properties window, it is enough to double click the left mouse button on the selected template.  The following fields and options are available in the template properties window: - "Name" - you can change the name of the template;
- "Version" - system information, indicates the version number and the date the template was created. The version number changes when you make changes to the template.
- "Localization" - from the drop-down list you can select the localization language (Russian, Ukrainian, English). You should select the localization language according to the language of the main template;
- "Description" - You can add a description to the template. This description will be displayed by the company employee when using the template in the task window;
- "Auto Add" - templates with the option enabled are available to company employees for use in the task window;
- "Allow Export" - this template will be able to import other organizations within the "Simple Business" system.
- "Delete empty rows in tables" - the algorithm for deleting blank lines in tables is applied.
EDITING TEMPLATE By clicking on the "Edit" button the template is opened for editing. You can type and format text, add a table, fields and resources. The editor control panel is similar to most other popular text editors. 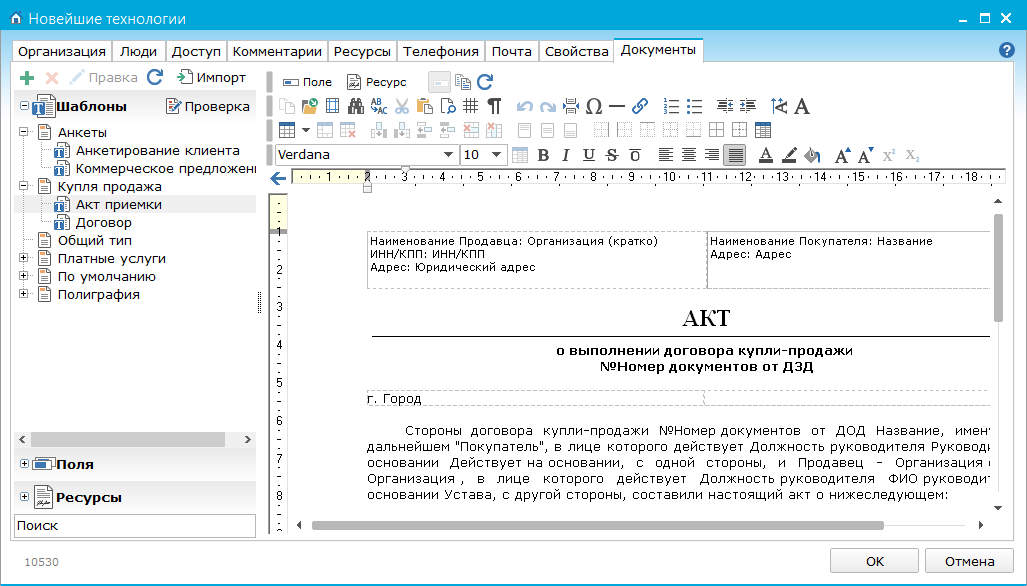 Let's dwell only on the separate functions of the control panel: - Button
 (Ctrl + space) - adds a new field to the template; (Ctrl + space) - adds a new field to the template; - Button
 (Ctrl + Alt + space) - adds a new resource to the template; (Ctrl + Alt + space) - adds a new resource to the template; - Buttons
 - serve to add / delete rows and columns in tables. - serve to add / delete rows and columns in tables.
Click on the "OK" button to save changes to the template, or to the "Cancel" button, if you do not want to save the changes. CREATION OF FIELDS IN TEMPLATES Fields can contain data, the value of which can be substituted into the template. Using fields, you can specify arithmetic expressions, the result of which will be automatically substituted into the template. You can create a new field by clicking on the button that is located on the toolbar at the top of the editor window, or by selecting the function of the context menu "Insert field" (on the keyboard Ctrl + space). In the window that appears, fill in the required field properties. 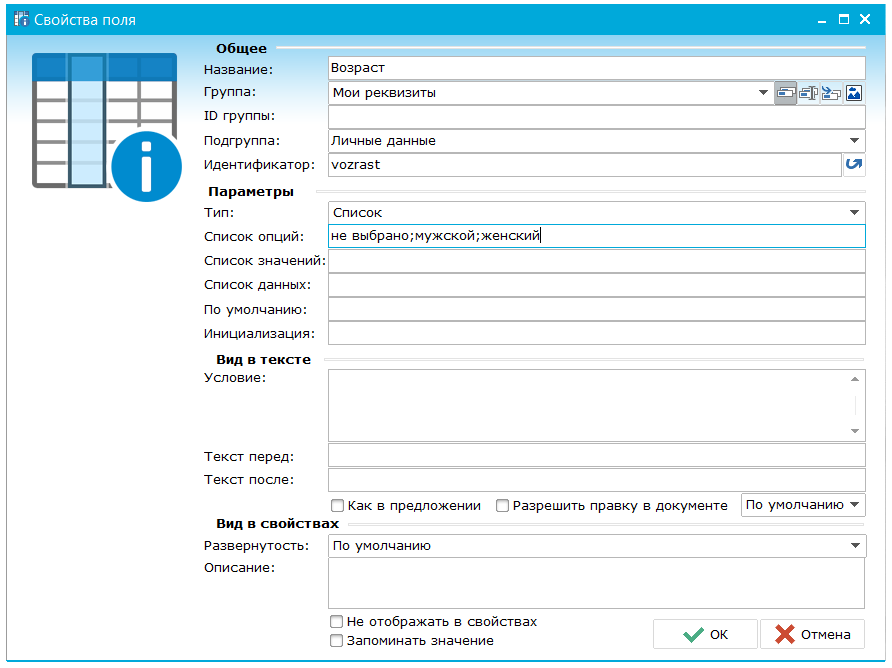 For clarity, the properties of the field are divided into the following groups: "Name" - the field is intended to enter the name of the field to be created; "Group" - this field specifies the group in which the created field will be located. By clicking on the different icons that are located next to the "Group" field, you can perform the following actions:  - "Select a group"; - "Select a group";
 - "Rename group"; - "Rename group";
 - "Put the field in a new group"; - "Put the field in a new group";
 - "Select a picture for the group." By clicking on this button you will be offered 8 variants of pictures for a group of fields. - "Select a picture for the group." By clicking on this button you will be offered 8 variants of pictures for a group of fields.
"ID-groups" - the identifier of the group; "Subgroup" - in this property, a subgroup is created / selected, into which the field will be placed. One group of fields can have several subgroups. "Identifier" is a unique feature of the object, which makes it possible to distinguish it from other objects (it is intended for further use when writing different arithmetic operations). The value can only be entered in English. The identifier can be generated automatically. To do this, click the button next to the "ID" field. "Type" - this property indicates the type of field (in the drop-down list the user is offered a choice of 15 types). "List of options" / "Expression" - lists the list of options that will be in the drop-down list or indicate the arithmetic operations that will be performed over the field. The list of options lists all the options that will be available on the form when the template is filled. "List of values" - indicates a list of values that will be visible when viewing the document itself after filling out the template form. "Data List" - indicates the list of values that will be stored on the server after saving the template. "By default" - the default value is placed in the document, if nothing is selected by the user when filling out the template on the form. "Initialization" is a constant for the field, that is, the value of the field that will not change. "Condition" - the condition for the output of the field value is specified; "Text before" and "Text after" - the entered text in these fields can be seen when looking at the finished template, since the text will be substituted before or after the field automatically. "As in the sentence" - when this option is selected, the first letter of the field name will be large. "Allow editing in the document" - when this option is selected, it is possible to edit the document fields directly without opening the window for editing document properties. "Deployment" - this property shows whether the field is deployed on the template creation form. "Description" - a field for adding a description. "Do not show in document properties" - if this option is selected, the field will not be displayed on the form when the template is filled. After the field is created, you can view its properties. Open the "Field Properties" window by double-clicking on the field created or selecting the appropriate item in the context menu. The Field Properties window automatically populates fields: name, field type and expression. In the "Condition" field you can specify the condition for outputting the field value. You can also specify arithmetic expressions using fields. For example, we will create 3 fields, with identifier values equal to a, b, c, and also with the filled default values. Create another field in which the result of the expression will be calculated. For the resulting field, we select the type of the Cell field. In the expression field, we write the arithmetic expression (a + b) / c + 100. Inserting the resulting field in the template, we will see the result of the calculated expression. CREATING RESOURCES The owner and administrator of the organization can download resources (scans of signatures, seals, logos, certificates, etc.) and use them further in document templates. You can insert a resource into the template by clicking on the button that is located in the toolbar at the top, or by selecting the function of the context menu "Insert Resource" (on the keyboard Ctrl + Alt + Space). In the window that appears, select the required resource and click on the "OK" button. 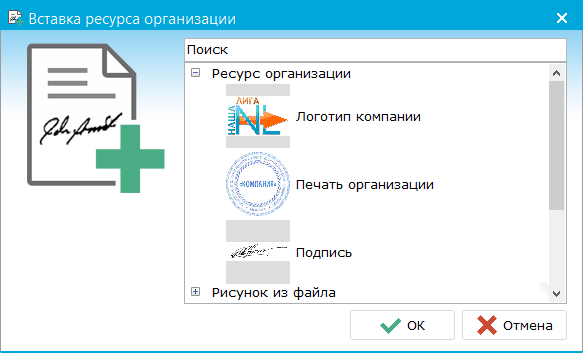 INSPECTION AND FILLING OF FIELDS After all the necessary fields have been created, you can check the completion of the fields on the form. To do this, click on the "Validate" button in the left panel, a window opens to populate the test data for the template. 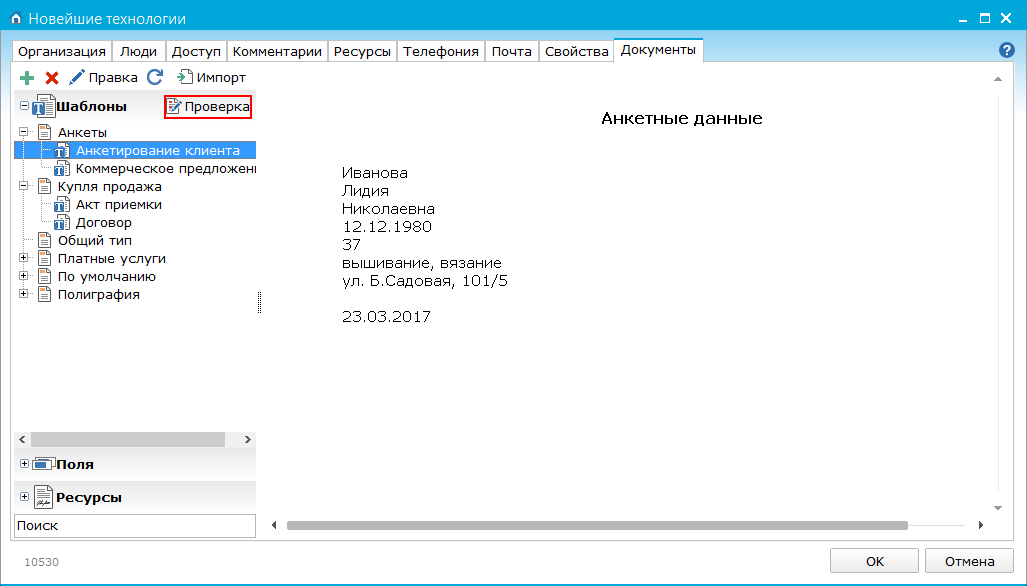 The window for filling in the test data for the templates is as follows. 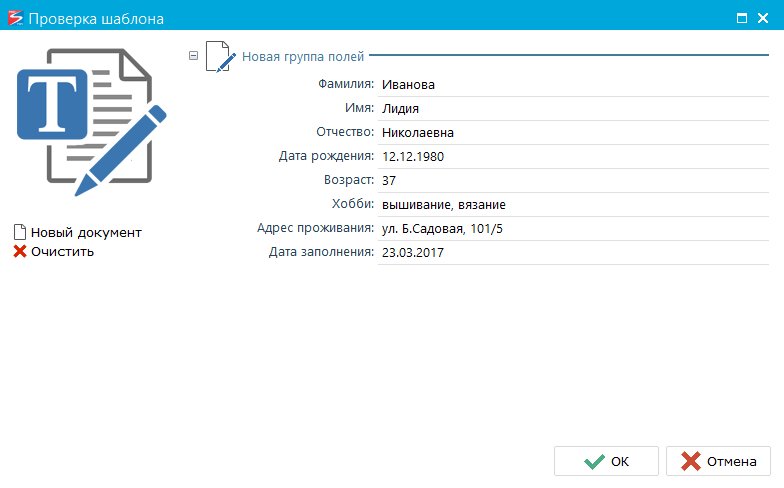 The "New Document" button - the form becomes the same as it will look when adding a new document. "Clear" button - all fields will be cleared and you will be able to fill out the template with test data again. WORKING WITH TABLES To add a table to the document template, use the "Insert Table" button, which is located on the top panel.  In the window that appears, specify the size (the number of rows and columns) and the width of the future table. Then you can start creating fields in the tables. To create a new field, you can use the "Field" button located on the top panel, or press the keyboard shortcut Ctrl + space. 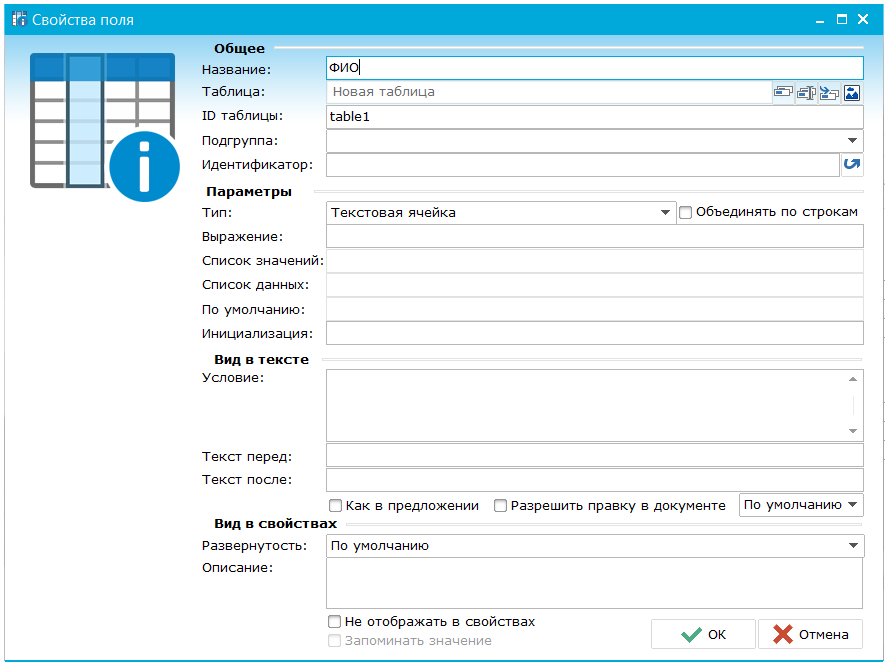 Fill in the following field parameters: "Name", "Table", "ID-tables", "Type". In the Type parameter, different values can be selected: Text cell, Integer cell, Cell (date), Real cell, Logical cell. If you create several tables in a template, then when you add fields related to the same table, the same table IDs must be specified in the properties. After adding fields to the tables, the document template looks like this.  Next, you check and fill out the tables on the form. By clicking on the "Test" button, which is in the left panel at the top, a window opens for filling out the test data for the template. 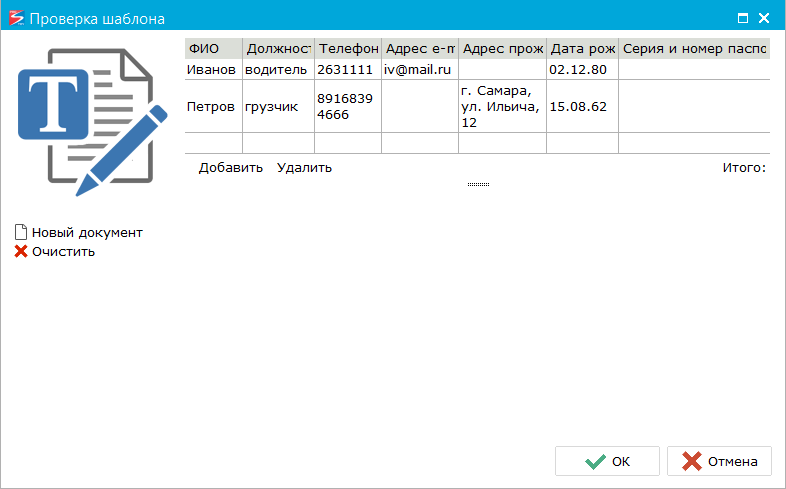 Managing the rows of the table is done using the buttons "Add" and "Delete" located below the table. 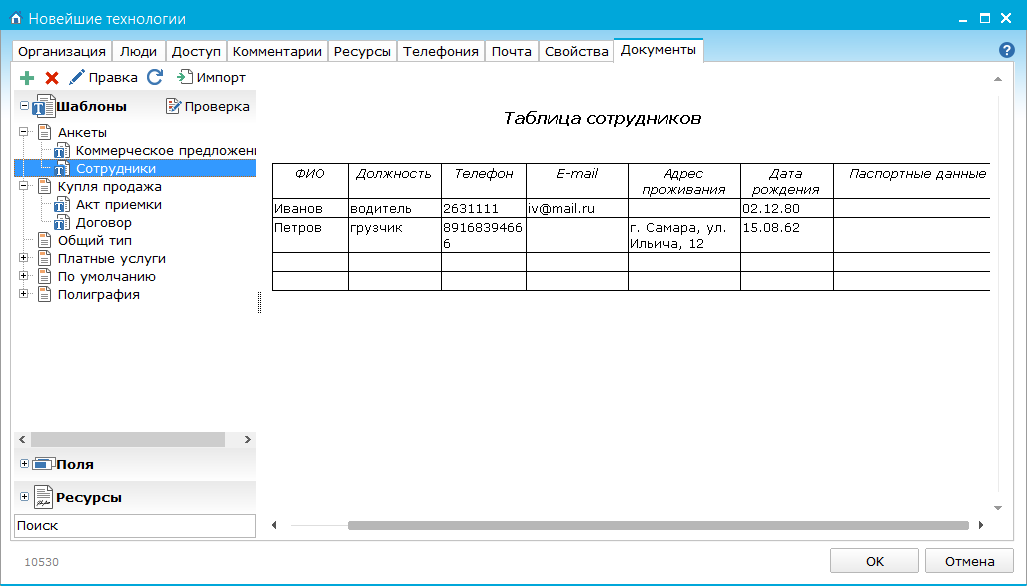 You can use the option of multi-line text input without opening the window for editing the properties of the field. When you enter multiline text in the template field, the text inherits the properties (field name, group ID, identifier) of the parent field. Create a "Paragraph" field in the template and enable the "Allow editing in the document" option. To add a new line, just press Enter.
|